 I got emails from some mothers asking if there is an alternative way of making their breadcrumbs without using oven. “Of course there is”, i answered and so the reason for writing this post. I decided to go all manual for the benefit of the mums that may not have a blender or most especially if NEPA decides to strike when you are about to make your breadcrumbs.
On thing i always strive to do here is keeping it simple and easy, so that you will not be deterred from trying out recipes for your kids because you don’t know or can’t find the ingredients, or that you don’t have the kitchen gadget used. I’m sure there are other mums (apart from the ones that emailed me) that will appreciate this post on how to make your breadcrumbs without using oven and blender.
Let’s start with what you need:
- Plenty Sunshine
- Ziplock back or thick waterproof (you can double or triple lighter ones)
- Rolling Pin or empty Beer Bottle
- Sieve and Bowl
…and of course your bread slices or the crusts (that’s the sides that are trimmed off)
Method:
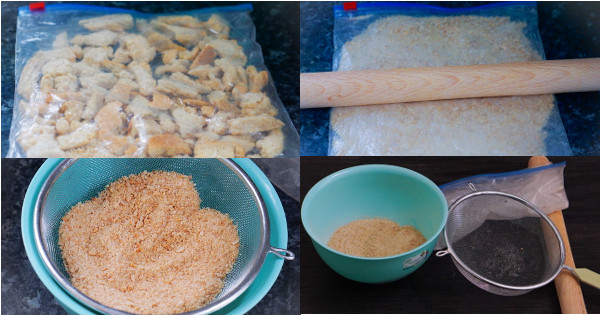
- Break the bread slices or crusts into tiny pieces, place on a tray and put out in the sunlight to dry. Depending on the degree of sunshine, it should be dry in hours. The harmattan period is a good season to dry up things outside too.
- Once dried up well, pour the breadcrumbs into the ziplock bag or doubled waterproof and place on a clean flat surface. Using the rolling pin or beer bottle, start rolling to grind the bread into crumbs. Keep rolling till they are all crumbly.
- Pour the crumbs into the sieve and sift into the bowl to get the fine crumbs.
- Put the crumbs that are left in the sieve back into the ziplock or waterproof and roll all over again to get crumbly.
- Repeat step 3 and 4 till you have no more or a negligible crumbs left in your sieve.
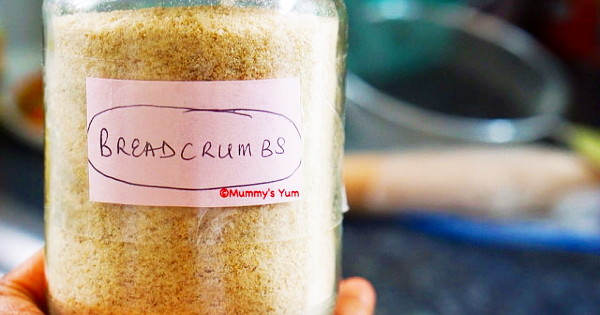
- Season your breadcrumbs (see initial homemade crumbs and seasoning ideas) and store in a jar.
 Easy peasy, right? Don’t forget there are other alternatives to breadcrumbs which you can also try for a difference…variety does it for the kids, remember. Try recipes with breadcrumbs like the Yam Croquette, Potato Balls or Chicken Nuggets.
I would love to hear from you and if you try this or any of Mummy’s Yum recipes, you can take a picture and send to me to repost or otherwise tag @mummysyum on your Instagram pictures.


easy indeed.
I think you can also dry the bread on low heat in a dry fry pan over fire, but watch it so it doesnt burn.
Nice tip again. Thanks Makalisia.
Good job! Thanks for the tips!
Thank you so much Ada.
Ohhhh….where have I been that am just meeting you ma,you are bless ma
Thank you God bless you
Hahahaha. Thank God we found each other. God bless you too.